Pages

Pinterest

September 13, 2013

Splendor Fall Event


Welcome to the Fall Splendor Blog Hop with PaperHaus! We are celebrating the release of the new FALL edition of PaperHaus Magazine but also celebrating the 1 year anniversary of PaperHaus Magazine! We are excited to be part of this amazing celebration! Click below to check out the latest edition of this amazing magazine!  The Fall Splendor event is filled with inspiration from PaperHaus and the eclectic Paperie team so make sure you click through each blog for inspiration! Enjoy the hop and remember that the Fall Splendor Blog Hop runs from September 1st to the 15th so plenty of time to be inspired!


http://issuu.com/thepaperhaus/docs/paperhaus_fall_issue_5_2013r


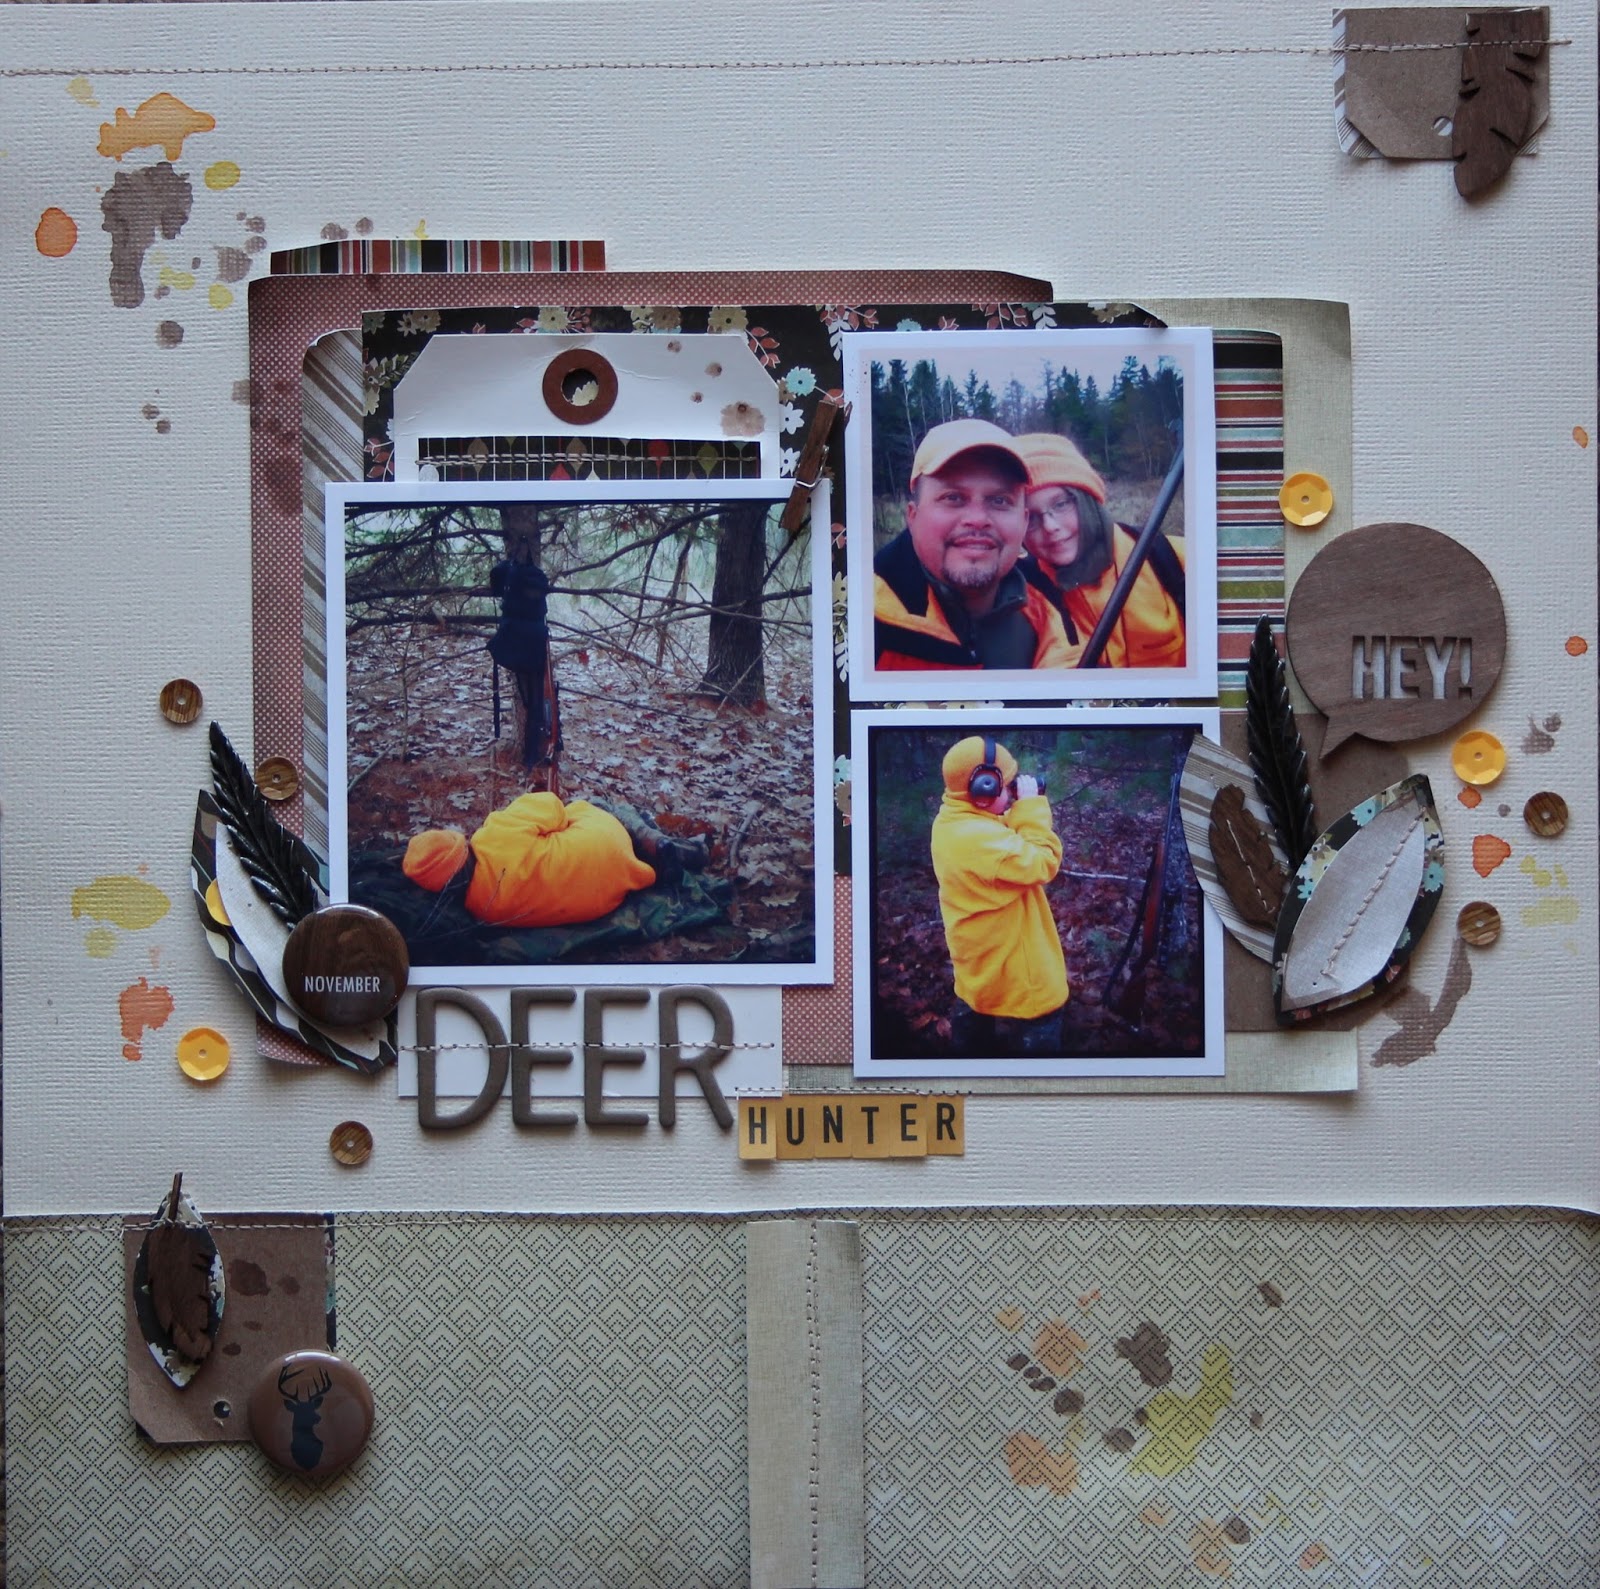
During the fall, my house consists of many conversations regarding weekend hunting.  My boys are always trying to find time to fit it in.  It's not top on my list of things to do, but, I do love the captured photos of my boys doing something they love together.  

I started with the 6x6 Basic Grey Hipster paper pad and one sheet of Bazzill cardstock.  I wanted a strip of long paper at the bottom of my layout so I pieced two strips of paper together and added another to create an obvious seam.  I chose papers from this non-fall collection that actually went with my fall theme and started layering papers under my photos.  I hand cut leaves, sewed them together with my machine.  I decided that my white space needed color and I remember seeing a technique on pinterest about making your own water colors.  In a vintage metal jello dish, I added one squirt of spray ink and a touch of water, dug out my Tim Holtz Splatters layering stencil and added until I was content!


 I practiced on scrap first since my layout was pretty near complete.  This allowed me to see that the color was too wet and strong at first.  After wiping on paper a few times, it became the color that I was looking for.  I continued this process with three different colors.  Then, I colored my wood veneers from Studio Calico and Basic Grey with the same brown watercolor that I had already made.  Added a few Studio Calico sequins attached with Glue Dots, and tucked in metal FarmHouse Paper Company feather trinkets, a couple appropriate flair from A Flair for Buttons and I was done.  Or so I thought.  It needed more stitching.  Did you know that you can sew through veneer with a really sharp needle?  IT MUST BE SHARP and take it slow!


Thanks so much for stopping in.
Mary-Ann

Below are the products you can purchase at Eclectic Paperie:


September 9, 2013

Never fails

It never fails, my family goes out of town when there are big events happening locally.  No, I am not talking about the corvette show coming up!  If this were my husbands blog, that would probably the topic!  I am talking about a baby shower welcoming twins, a boy and a girl!  I am bummed that I will not be a part of the festivities.  I have joined forces with a couple of friends for the gift giving and volunteered to make the card if they would do the shopping:o)  Win win!   Here is what I created....


Notice the "S" added to "Welcome Little One" rub-on?? 
I have been hoarding this paper collection for quite some time.  It is an older line by Fancy Pants called Baby Mine.  I have created several cards with this collection.  I backed the balloon and precious hearts with foam tape for some dimension.  A little brown twine from May Arts was just perfect.  Not too much embellishment, just right!
Babies make me happy:o)
Mary-Ann

August 30, 2013

READ


I have always believed that reading to my boy is very important.    Since Roman was young, we would cuddle in his bed, he would twirl my hair and I would read.  Now that he is 8, he is reading to me.  I must admit that I miss the hair twirling!  Reading is definitely his strengthYou would know that if you were ever in our house during math homework!  Except this summer, time has snuck by, summer reading homework is not complete, and getting him to read in our time crunch is like pulling teeth.  So, on a long trip to the grandparents in Maine last weekend, we rented a couple audio books from the local library and voila, the problem is solved!  He was bored in the car, so listening and flipping pages filled the time gap! (You know if you have ever had an 8 yr old, this was still a struggle.)

For this layout, I knew which photo I wanted and needed a background color to anchor my "302" 6x6 papers from Farmhouse Paper Company.  I layered my papers, metals, tags, stickers, chipboards until I developed a collage that I liked.  Once my papers were glued down, I decided to add scattered stars using the Stars layering Stencil by Tim Holtz.  This stencil allowed me to place different size stars exactly where I wanted them.  I threw on some yellow punched stars (Studio Calico) I had on hand and some sequins (Michael's).  I stapled the sequins, to help bring in more metal for balance.  They were attached with Tim's Tiny Attacher and a long reach stapler from Staples.  I added stitching, foam tape behind items that needed dimension and a title cut from my Silhouette.  


Thank you for taking a peek at my layout.  Hope you are inspired to fill some more pages of your albums!

Mary-Ann
For Farmhouse Paper Company's"302" items shop HERE!

All other items used are from Eclectic Paperie:  

August 23, 2013

Hero Factory

I love when I come across older photos that I never did anything with.  The every day photos of my boy playing with things that he loves.  I love his sense of organization and the ability to play with the same item for hours without a playmate.  I guess "only" children adapt. 

This layout was created using Studio Calico's Valley High Main kit, Project Life kit and the Matthew add-on.  LOVED LOVED LOVED these papers and the super cute green embellies that matched the green flair and the green in the dies!  Wasn't sure about the random hole punches but have decided I NEED more!


Thanks for stopping in.
MA