Pages

Pinterest

Showing posts with label Basic Grey. Show all posts

January 30, 2016

Remember Today - A Flair for Buttons

Morning.  Still wrapping up some Christmas layouts.  I will probably be doing it FOREVER!  Just last week I shared a layout on the A Flair for Button blog using the same papers by Basic Grey.  It document our trip to the North Pole Express.  Here is another layout that coordinates with that one.
This one has the creepy characters:o)


Head over to the AFB blog to check it out and to see what flair I used!


January 19, 2016

North Pole - A Flair for Buttons

Join me over at A Flair for Buttons as I try to document some of this past Christmas memories.  It is really hard to create with Christmas right now with all the pretty springy lines. I MUST get it don't.  I WILL get it done!  Anyway, I used the flair directly in my title!  Go check it out.

December 3, 2014

Silly Elf - A Flair for Buttons

Today I have a layout of last years elf antics up on the A Flair for Buttons blog.  I decided I would created a layout with 18 of my favorite elf shenanigans from 2013.  I kept them small and in a film strip style.  I used Basic Grey Evergreen and beautiful flair to accompany!


Please head to A Flair for Buttons blog to see even more photos of my photos, ha!


February 19, 2014

Gamer & Ouch! Get Up!


I am featured over at A Flair for Buttons blog today with two layouts!   The Etsy store may be on vacation for a couple days but creating with flair never stops!  I recently asked for two specific flair.  Epic Fail and a pair of headphones.  Both, perfect for what I had in mind for my next layouts.  

My first is Gamer.  He is too cool for school wearing a skull bandana, a Wreck-it Ralph t-shirt and kid sized headphones, which aid in his selective hearing.  I created this layout using Studio Calico's Sugar Rush kit, OhDeerMeKit by Feckled Fawn and the perfect flair!
IMG_2518

IMG_2519


My second layout for today is Ouch! Get up!  
IMG_2522

Told you the flair I requested was perfect!  Disclaimer:  my son was not hurt during this event.  Matter of fact, I said wait, let me get my camera!  He got up saying, "Mom, I am glad you made me wear my helmet!"  This was the perfect opportunity to throw out there that I DO know everything!

IMG_2523

gulp!  Look at those wooden dots by MME.


IMG_2525

IMG_2526

Since my layout was greens and blues, I used some of the Fresh Cut tape strips by Basic Grey and layered them and added embelishments to the top.  I think it helps pop my arrow flair!  Sometimes with older chipboard letters, they tend to loose their stick.  I reinforce mine with stitching.  The random pieces that do not fit under the stitching get a dab of glue.  For the vellum, what better way to attach than an extended reach stapler from Staples or Tim's Tiny Attacher if is close enough to the edge.  Hope you are inspired to create with some flair on your next layout.  

September 13, 2013

Splendor Fall Event


Welcome to the Fall Splendor Blog Hop with PaperHaus! We are celebrating the release of the new FALL edition of PaperHaus Magazine but also celebrating the 1 year anniversary of PaperHaus Magazine! We are excited to be part of this amazing celebration! Click below to check out the latest edition of this amazing magazine!  The Fall Splendor event is filled with inspiration from PaperHaus and the eclectic Paperie team so make sure you click through each blog for inspiration! Enjoy the hop and remember that the Fall Splendor Blog Hop runs from September 1st to the 15th so plenty of time to be inspired!


http://issuu.com/thepaperhaus/docs/paperhaus_fall_issue_5_2013r


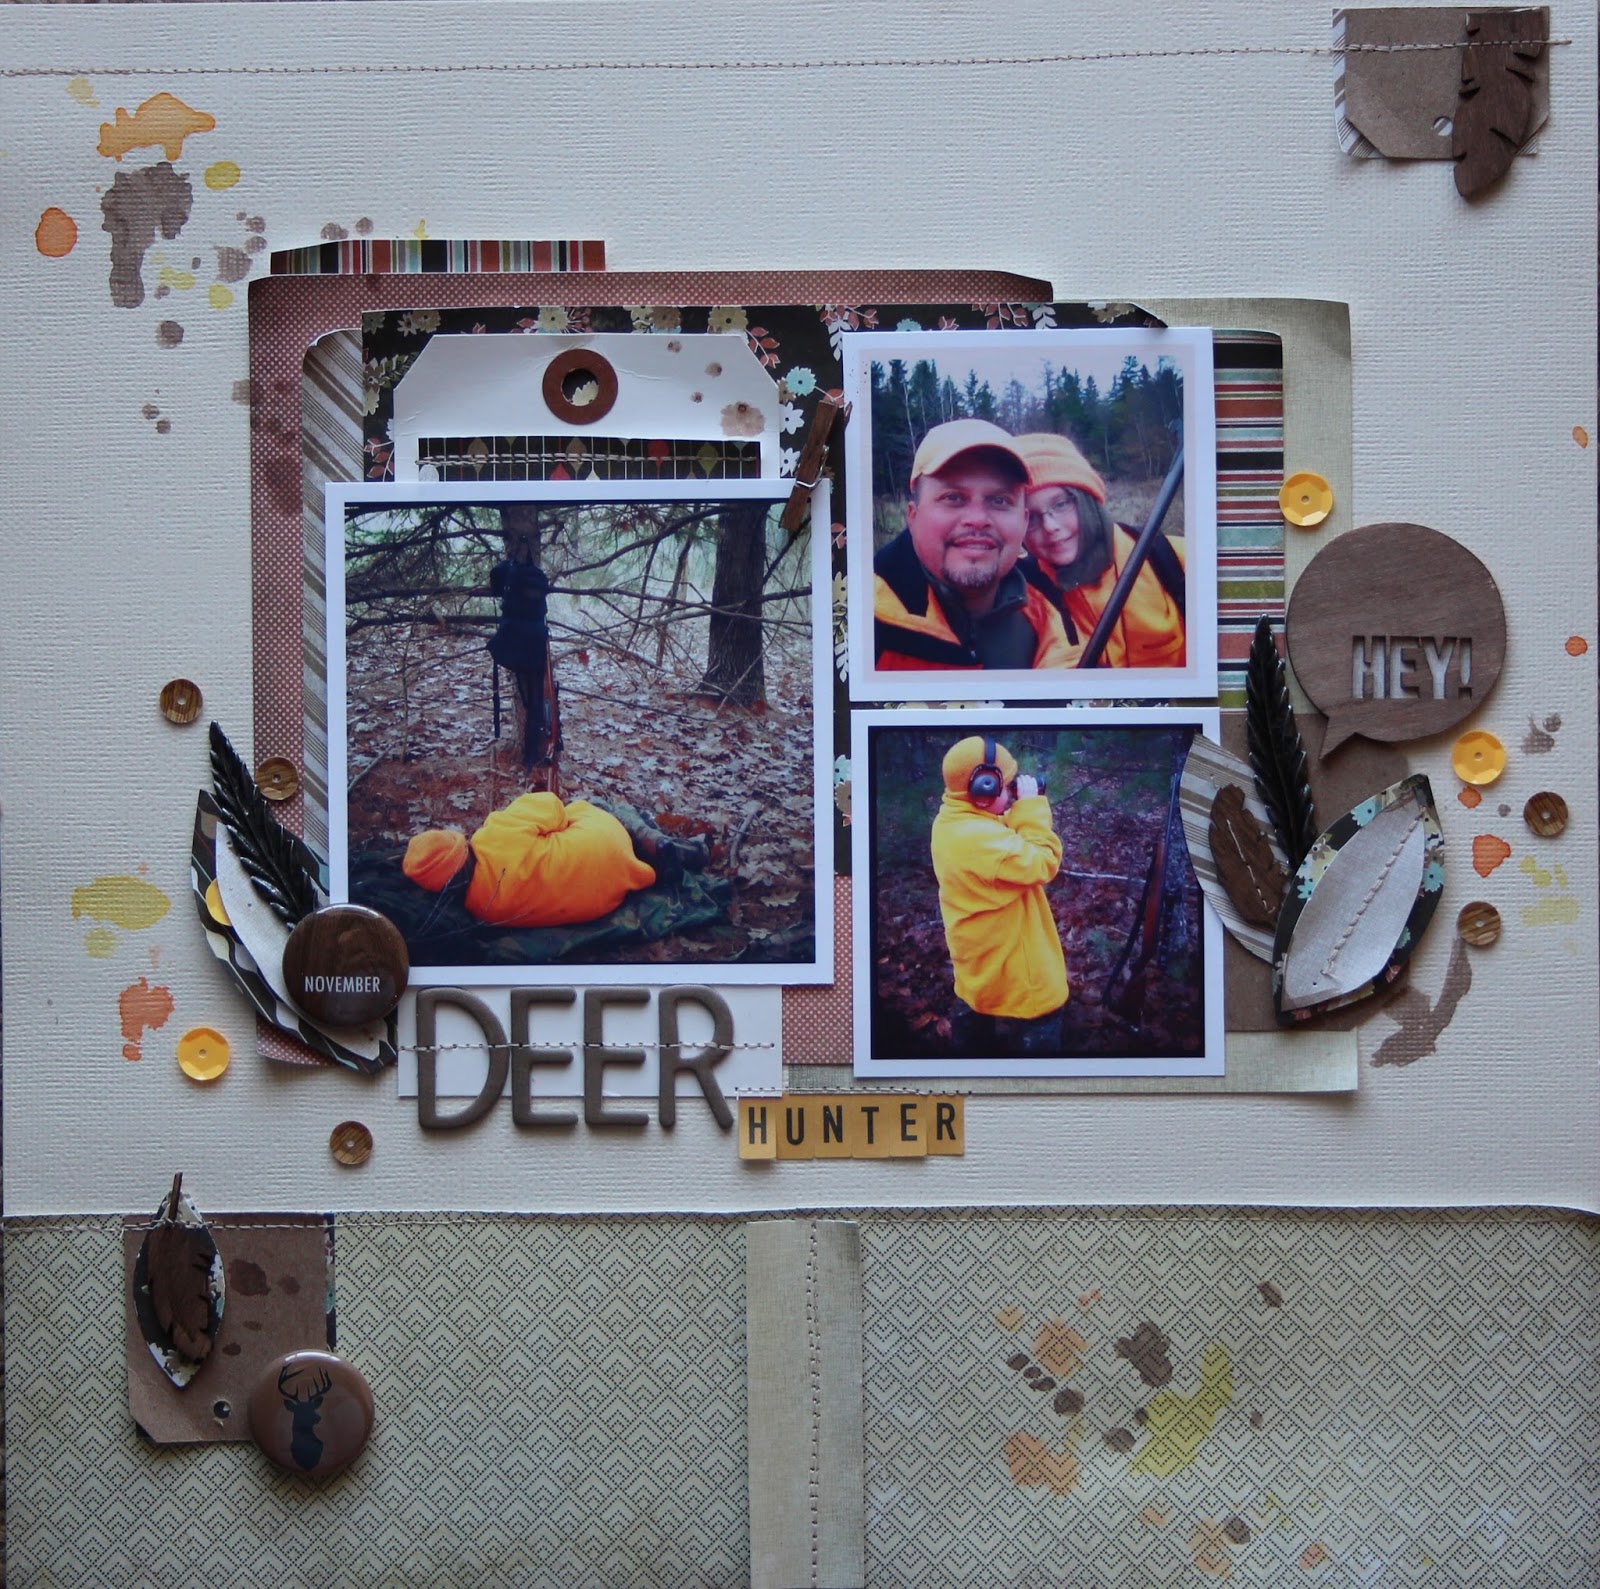
During the fall, my house consists of many conversations regarding weekend hunting.  My boys are always trying to find time to fit it in.  It's not top on my list of things to do, but, I do love the captured photos of my boys doing something they love together.  

I started with the 6x6 Basic Grey Hipster paper pad and one sheet of Bazzill cardstock.  I wanted a strip of long paper at the bottom of my layout so I pieced two strips of paper together and added another to create an obvious seam.  I chose papers from this non-fall collection that actually went with my fall theme and started layering papers under my photos.  I hand cut leaves, sewed them together with my machine.  I decided that my white space needed color and I remember seeing a technique on pinterest about making your own water colors.  In a vintage metal jello dish, I added one squirt of spray ink and a touch of water, dug out my Tim Holtz Splatters layering stencil and added until I was content!


 I practiced on scrap first since my layout was pretty near complete.  This allowed me to see that the color was too wet and strong at first.  After wiping on paper a few times, it became the color that I was looking for.  I continued this process with three different colors.  Then, I colored my wood veneers from Studio Calico and Basic Grey with the same brown watercolor that I had already made.  Added a few Studio Calico sequins attached with Glue Dots, and tucked in metal FarmHouse Paper Company feather trinkets, a couple appropriate flair from A Flair for Buttons and I was done.  Or so I thought.  It needed more stitching.  Did you know that you can sew through veneer with a really sharp needle?  IT MUST BE SHARP and take it slow!


Thanks so much for stopping in.
Mary-Ann

Below are the products you can purchase at Eclectic Paperie: