Pages

Pinterest

January 30, 2014

Toys for Tots

With my husband being a retired Marine and has spent several years during his career participating in Toys for Tots, it was kind neat having connections to help Roman's Cub Scout group get involved.  The Cub Scout Group started collecting for Toys for Tots 3 years ago, but this is the first year that our friend, Chief Jennings (Navy) participated so we had to capture photos!

It was really neat to have the Marines & Navy, do uniform inspections on the boys, shake each hand and thank them individually for helping other, less fortunate children.  

I wanted to keep my layout clean and highlight the photos, my title and the "Say Cheese" tag.  I used this months Copper Mountain scrapbooking kit from Studio Calico and a few older ones as well.  Under the photo to the left, I did add some journaling.


I felt that my thin title needed stitching to help keep in place.

 
These black circles you see are from an older Studio Calico Stamp Set.  I added them to help balance the bold black on my tag.


Thanks for peeking in.  
Mary-Ann

January 28, 2014

Outside

It has been below freezing here for about 2 weeks now, there is not much outdoor activity happening.  Bubba did have some friends over yesterday for a bit, they played Nerf outside.  They came in with frostbitten hands and really runny noses!  I might be exaggerating just a little of the frost bite part.  I think we have cabin fever.  I don't want to leave the house.  My feet are frozen ALL of the time, just ask my husband;O)

I got to play a bit yesterday when I refused to venture out, and this is what I came up with.


This was from last August up in Maine.  Look how cozy my boy was when they stopped for a break!  He is a bit foolish.  This totally captures his personality, to a T!


I used my Copper Mountain Studio Calico kit and some printable labels from Hello Forever!


The brown flair and the "Love Life" flair are brand spankin new from A Flair for Buttons.
  I need more!


Thanks for stopping in today.  I do have another, perhaps I will share tomorrow!

Adios! (my boys are learning Spanish with Rosetta Stone, it is rubbing off on me!)
Mary-Ann

January 25, 2014

You & Me


I am up on the eclectic Paperie with this layout today.  It took me four tries......


Yup, four.  Ever have one of those days when you have something in your mind but it just will not translate to paper the way you envision it?  Sometimes the results are even better anyway (now imagine me sticking my tongue out at my layout like a 3 yr old).  I created this layout by cutting the best watercolor heart out of one of my previous 3 pages.   My pink paper that you see to the side has remnants of one of the attempts.  See the gesso on the bottom?  You can also see some on my heart.   I totally smeared that page with my sleeve.  Although the whole layout was not salvaged, I managed to save some of it.  


I like dimension on my pages, you can see it all from this angle.  I actually sewed the smaller hearts right to the 12x12 page, then curled my sides up.  The strips of paper that you see are all from one sheet of the 6x6 Fancy Pants Be. Loved. paper pad.  (Which by the way are hard to keep in stock.)  They created just enough embellishment to match my flair buttons and punched hearts. 


Anyone notice the twine shaped as a heart?  I love these photos of my boys.  You can feel the love.  Towards each other, not me, obviously, I am the one capturing it all with a camera.  BTW, those gray dots that look like enamel dots, I created those using Tim's Distress Paint - Brushed Pewter.  Need to get another bottle of that, I am using it like I love it:o)


Here is proof of one of the mishap pages.  Why did I use brown?? Good question.  But I did like the effect of the smear, however, when I added all my other embellies, I needed to trash the brown, for obvious reasons.  That and my non-artistic husbands asked what I ripped up from that spot.  Not cool.  

The fine products I used on this and the other three layouts are listed over at the shop, click HERE.  Head on over to the shop to get your hands on what you need to create your next Valentine.

Mary-Ann


January 24, 2014

How are you?

I made these cards the other day and forgot to share them with you.  Ever have scraps left over?  Or need a quick card?  I just printed my sentiment on white cardstock and cut it to my liking.  These will be warmly welcomed if I ever send them out:o)  


I used Lily Bee Design Pinwheel collection.  There small colorful prints are perfect for so many things.

Mary-Ann


January 22, 2014

My Dear Love

EEEKKKK!  Don't you just adore this doodling paper from Bella Blvd?  It was in this months Copper Mountain Studio Calico Kit.  So were the deer and heart project life cards.  I really wanted to pair this paper with splashes of red.  I dug out all of my red, black and white flair and narrowed it  down to the clump of 5 to the right.  Added a few of the heart veneers from my Oh Deer Me kit from Freckled Fawn and some other stamping, inking and tag embellies and I was done.


I love using a mix of flair on my projects.  You can see other flair inspired layouts and projects over at A Flair for Buttons by clicking HERE.

Mary-Ann

January 21, 2014

I HATE Math Homework

Could this be me or my son talking???  It is definitely both of us.  Not sure what it is but homework time in our house is like standing on hot volcanic ash barefoot, or sticking needles in your eyes.  Get the idea?  I have tried different times of the evening, snacking first, free time first, talking to the teacher, I sit with him, I have left him alone, no matter what we try, NOTHING works.  What is supposed to be 30 minutes takes 60-90 minutes.  He is frustrated, I am frustrated, even the dog is frustrated.  Not sure if we are gonna make it through third grade.  What I mean is, not sure if we are gonna SURVIVE third grade.  This is exactly why I do not homeschool.  I praise those who have the patience.  I DO NOT!  I am reminded daily.

Any-who, he is smart.  He loves to read.  The main problem is getting him to focus during the paper part or to stop reading in a timely manner to journal about it.  Stop piddling and get down to it.  (I know that it sounds crazy to try and get your kid to stop reading, but he needs to write about what he read, which takes another 30 minutes!)  Not sure if I ever shared this with you, but his first grade teacher swore that he will NEVER have high blood-pressure!  Says that he is just too laid back.  I should have got that in writing.  Mmmmhmmmm, she thinks its cute!  I guess it makes for super cute scrapbooking pages.

So, with that said, WE, collectively hate homework!


This is the first day of school.


This melt down is 6 days in!

During Sunday's depressing football games, my friend and I had a play date!  This is what I created just for fun using my Studio Calico Copper Mountain Kit, Sling-shot Add-on, and Project Life kit.  


Here I found my colored pencils, line them up like a rainbow and started lightly coloring.  I did have too mix a couple colors to be able to fill all my squares.  Then I smudged them with a wet paint brush and added my stickers. 


This orange tag is the one that your supposed to keep to mark down which kit this is.  The orange was perfect for my pictures.  I inserted the transparency on top of it in the slot and it was perfect.  Except for the saying in the middle of it.  I covered that with flair.


Originally, I sprayed my wood veneer circle thingy that came with the kit with white paint.  Turned it upside down and smushed it on my amazing Chic Tags base paper to try to use it as a stencil.  Once it dried, you could barely see it.  So I dug out my white gel pen, put the stencil back down and traced the inside of the circles.  Still not what I was looking for.  So I started adding little embellishments to the circles.  Punched some of my favorite papers, backed them with foam and added them.  I love how it turned out.  Not how I originally planned but better!  There was a chipboard piece that said "Melt Down" which would have been perfect for this layout except it was pink.  Just didn't match this time.  I WILL find a place for that though:o)

Hope to see you soon,
Mary-Ann

January 18, 2014

You & Me & Him

Traditionally, I would do a "lovey dovey " layout about my main squeeze, but since I have two main squeezes,  this is what I came up with.


I love incorporating pink into a page with guys on it!  I included, Studio Calico's Blue Note kit, Heidi Swapp, Chic Tags, Oh Deer Me kit by Freckled Fawn (November & January), October Afternoon Sprinkles, and a few other surprises.  It is jammed packed with goodness.  I love the cork! The hearts! The tags,  and the goofy kid photo bombing our picture!

Take Care,
MA


January 17, 2014

Our World

This photo was taken just a couple days after Christmas.  He is plum warn out.  At times I turn and look and he is going on 19, other times, he is still just my precious baby.  Can you tell that his birthday is coming soon?  I'm emotional just thinking about it.  I gotta tell ya, there is nothing in this world more important than this little guy.  Even when I threaten to remove him from this world:o)

This layout was created using an assortment of manufacturers: A Flair for Buttons for the blue flair and the "Enjoy the Little Things" flair.  Lily Bee Design for the paper, the world flair, wooden button and the chipboard.  Studio Calico for the large blue tag and yummy wood veneer.  Chic Tags for the important "You mean the world to me" tag and heart tag.  Freckled Fawn Oh Deer Me kit for the cork and washi tape.  Heidi Swapp for the best ever spray mists.


Thank you for stopping in again:o)
Mary-Ann

January 15, 2014

Hello Sunshine

Hi!  I'm here to share a mini album with you today.  I had a vision in mind after searching and searching handmade mini  books and finally made it into a reality.  I am saddened that my boy is turning 9 really soon.  Too soon.  I wanted to list out some of my favorite things about him, written in a letter type form so he could have it always.


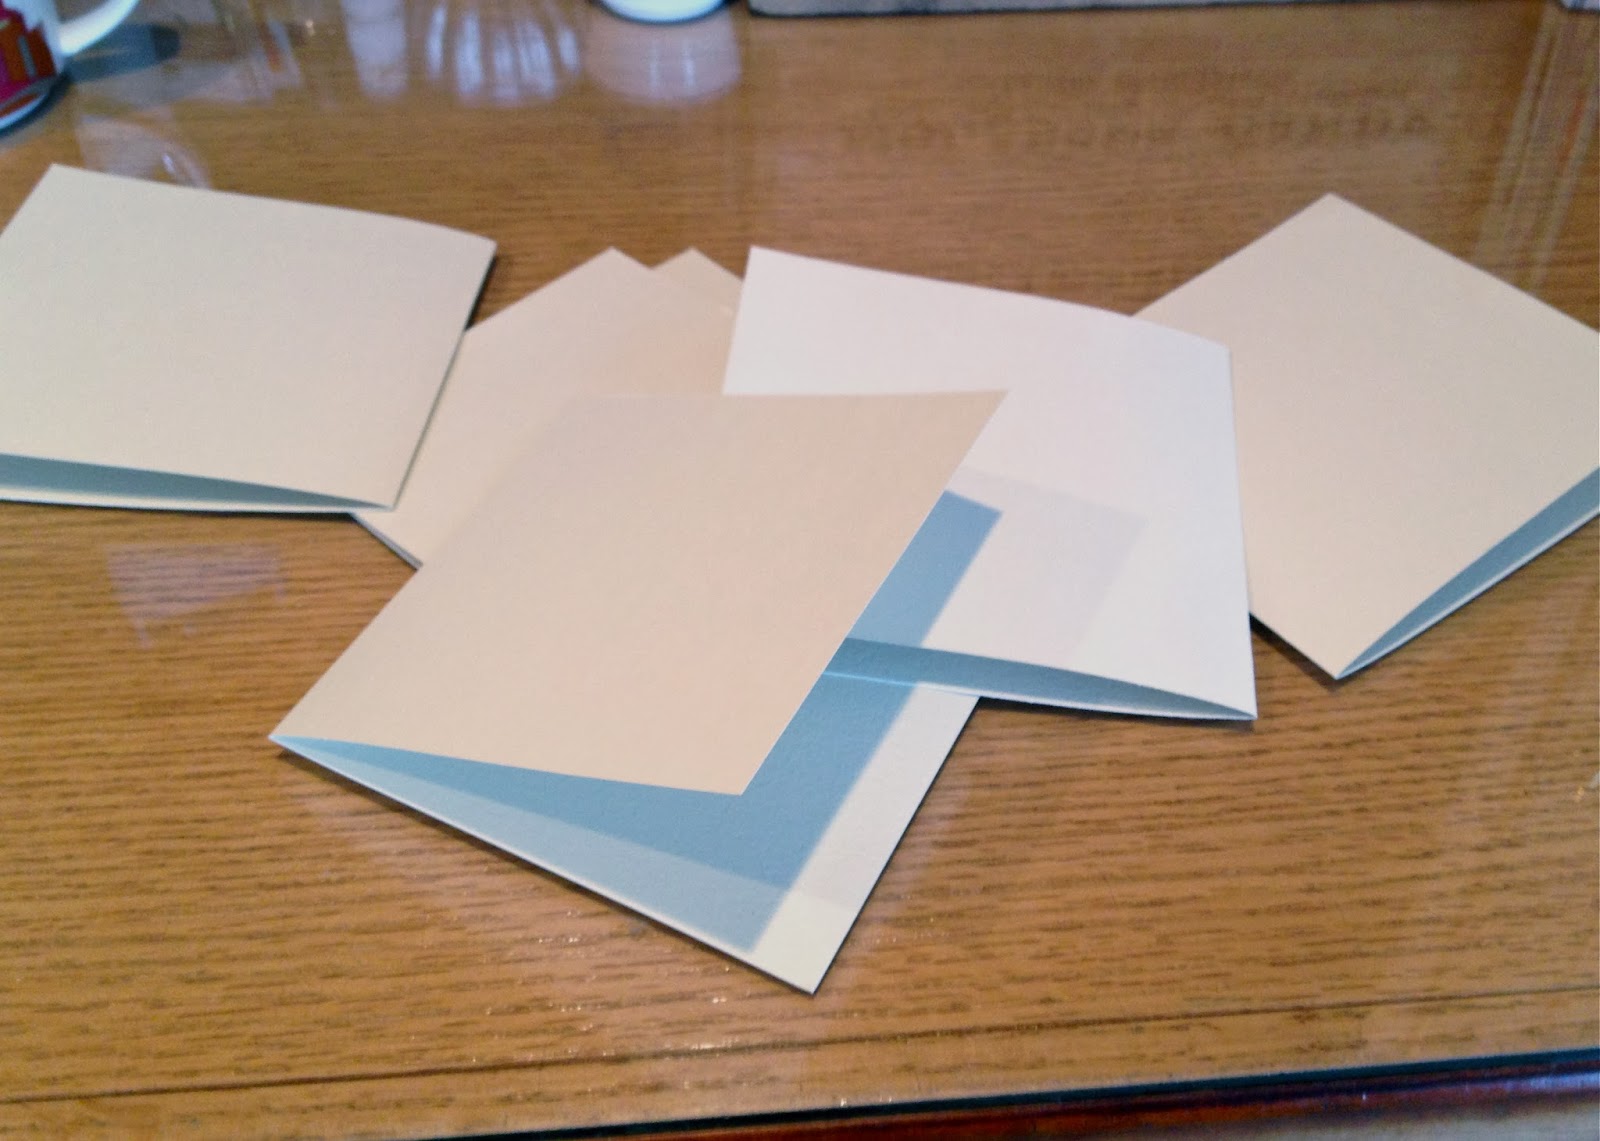
I started by cutting several papers 4 x 10.  I wanted the pages of my album to be 4x5.  Since I was using textured cardstock, I scored them and folded them textured side in.  Create the number of pages you want in your album.  Pretty much making a bunch of cards.


I placed them back to back with strong adhesive.  


Added some machine stitching to ensure the  the security of my pages, since it will be in little hands:o)


I added Lily Bee Design patterned paper to the front of my mini and then added a section to my spine and sewed this in place as well to ensure stability.


Now time for decorating!


Remove the clothespin to gain access into this sentimental journey.

If you look at the inside of my book.  All of my pictures are printed 3x4.  I did leave a white border around my photos to help contrast against the patterned paper.  I added a doily to most pages,  Studio Calico large gray tags with my journaling, patterned paper 4 3/4 x 4 1/2 and on many pages, a 2x 4 3/4 strip of paper.  After adding a title (cut with my Cameo), machine sewing and a few coordinating embellishments,  you have yourself a simple treasure.  Be careful in your placement of your bulky embellishments, make sure they are not repeatedly in the same spot, it will get too bulky.


Thank you for taking a look.
Mary-Ann


January 13, 2014

December Daily 13-15

I am treading water  but I feel like I am soon to drown with this December Daily.  I am not a quitter.  I will get it done.  Have set a much more realistic goal for myself of July 1st!  I have complete just a couple more pages and thought I would share.  If your still interested since Christmas is WAY over:o)

December 13th:


He is gonna kill me if he ever sees my comment.  Or ever stops to actually pay attention to it.  He did notice the picture and blushed a bit!


I tucked a copy of his report in the 4x6 pocket.  A+ from A Flair for Button is attached to the top of my page protector.


This Freckled Fawn button is added to the top too.


So I read on someones blog the other day that they set their pictures and embellishments on top of the page protectors when photographing.  I like this better except I can not do it when I have added embellies to the top of the PP.  But, I do think you get a much cleared, less glaring picture.  

December 14th:


I attached the litter sticker ribbon right to my photo and sewed.  This will help it stay in place if ever the sticky part decides it doesn't want to stick anymore.


Sewed straight through these this wood veneer too!  

December 15:


Thanks for stopping by.
Mary-Ann